
Proper Mandolin Setup
Author: Allan Kumpulainen Date Posted:October 30, '18
.jpg) Your mandolin setup is critical to the note accuracy and enjoying the playability of your instrument. The setup of the mandolin depends on your preference, however, no matter how you like your action, there are several important points to consider when setting up a mandolin.
Your mandolin setup is critical to the note accuracy and enjoying the playability of your instrument. The setup of the mandolin depends on your preference, however, no matter how you like your action, there are several important points to consider when setting up a mandolin.
This article will cover the basics and will serve as an overview to give you an idea on how different adjustments can make your mandolin play and sound great.
*Choosing Strings*
.jpg) The easiest way to affect the playability and sound of your mandolin is with your strings. String gauge will have a major factor on the feel and tone of your mandolin.
The easiest way to affect the playability and sound of your mandolin is with your strings. String gauge will have a major factor on the feel and tone of your mandolin.
Lighter gauges are easier to fret and are ideal for beginners. They tend to have a brighter sound but may produce less volume and sustain, and may not bring out all the resonance and tonal richness that your mandolin can produce.
Heavier gauges are somewhat more difficult to fret due to their greater tension. They can produce a richer and deeper tone with more sustain and more volume. They are suited for people who use a strong picking attack.
*Bridge Adjustments*
The bridge takes care of three main things: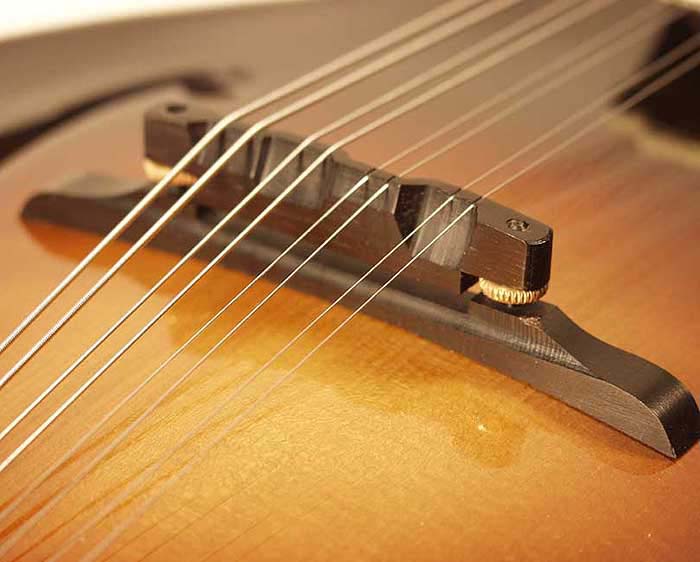
~String Radius – For even playability across the fingerboard, the radius of the strings at the bridge should match the radius of the frets. With this in mind, rest a straight edge across the strings just in front of the bridge. All strings should touch the straightedge with no high or low strings. This can be adjusted by filling the string slots to even out the strings.
~Action Height – Ever wondered what the little wheels under your bridge top do? This is it. The top of the bridge sits on these wheels which move up or down when turned. This raises and lowers the action. To measure the action, check the height of the strings of the fret at the 12th fret with the string fretter at the first fret. You can use a feeler gauge or a little ruler to measure the string height.
Fifty Thousandths (0.05) of an inch on the bass strings and forty thousandths (0.04) on the treble strings will allow a clean tone with comfortable playability. If the action feels stiff, you can lower the bridge. If there is string buzz, raise it.
~Intonation – Intonation is the proper gives a mandolin the ability to play in tune up and down the neck. A poorly intonated mandolin may be perfectly tuned but will produce sharp or flat notes on areas around the neck. We have provided a step by step procedure on how to properly set the mandolin bridge.
Note that the bridge can slide up or down (forward/backward) over the face of the sound-box:
1. Set bridge at about
~ONE INCH from the edge of the sound-hole or
~if there are f-holes, set bridge between notches at f-holes
2. Bring the strings up to about 1/2 pitch.
3. Press down on the 12th fret (see double set of dots on side of fingerboard) and listen to see if the pitch of the string is one octave ABOVE open string.
~If yes, you are done! STOP
~If not, proceed to #4.
4. Slide the bridge. Sliding should be:
~Forward (toward sound hole) to raise the pitch at one octave or
~To the opposite direction to lower the pitch at one octave.
5. Go to step #3
*The Nut*
Checking string height at the nut has an enormous impact on how the mandolin plays in the first position. If the strings are too high, it will be really tough to fret and the intonation in the first position can be sharp. If the strings are too low, they will buzz when played open. String height is adjusted by filling the nut slots until the strings are at the desired height. Twelve thousandths (0.012) of an inch clearance under the G and D strings, and ten thousandths (0.010) under the A and E are the advisable measurements. Adjust as deemed necessary.